Sunday, June 26, 2011

Frilled Flower

I had a coworker ask me to make a cake for his wife's birthday. I'm sure there are guys out there that are full of ideas and care about cake decorating, but this guy is not one of them. He did not care except that it was chocolate with chocolate icing. So I get some details about his wife... the few he could think of. She likes dolphins, lily of the valley... that's about all I got. Well since it was a chocolate cake I didn't want a dolphin to be swimming around in brown icing so I nixed that idea. I've never made any lilies of the valley but from what I researched I didn't want to for this cake.


The good thing about not being confined to the ideas he gave me was that I could do whatever I wanted. That can be tricky especially since I am the most indecisive person ever. But I recently saw a post on My Cake School of a flower she did inspired by her little girl's favorite shirt. I thought it was cute and wanted to try it sometime. What a perfect time!


I also got a Cricut Cake last year and should really use it more. I have found it's trickier than I thought it would be, but I have it and know it can work so I am determined to not give up on it! I just need to work with it more. One of the cartridges I have has a "happy birthday" image so there we go! I can practice a new technique I found and work with my Cricut.


Before I start decorating the cake, I think "I'll do a tutorial of this flower." Then I begin... haha, I quickly learn you can't do a tutorial on something you've never done before! Duh!! She just made it look so easy that I didn't think I'd have an issue doing it. Maybe it is really easy for everyone else and I'm just a slow learner. That is a valid option. I also just did it pretty much from memory. It's funny that I test my memory even though my husband just offered that we get my memory checked. Haha, it's going early. Again, I think it is a simple technique but her flower looks so much better than mine. I suppose I can chalk it up being my first time. I have to do it better next time.


I will show you a few steps...


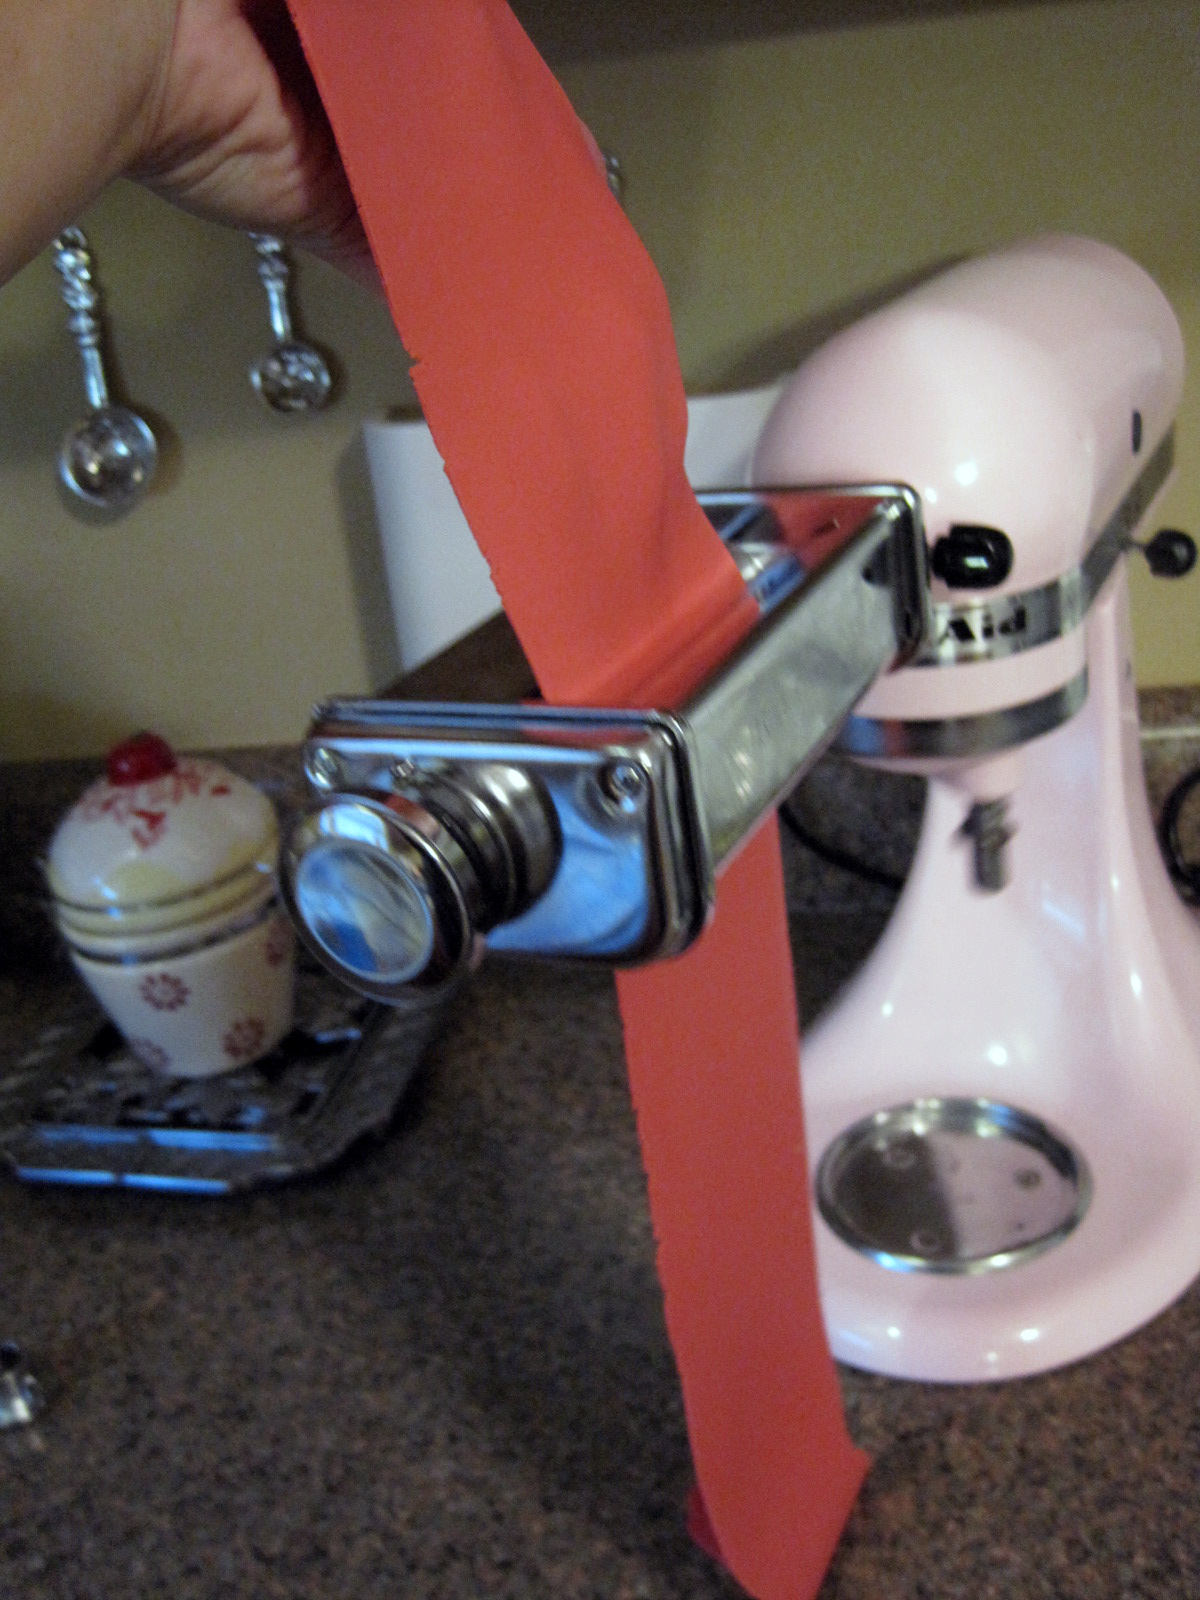
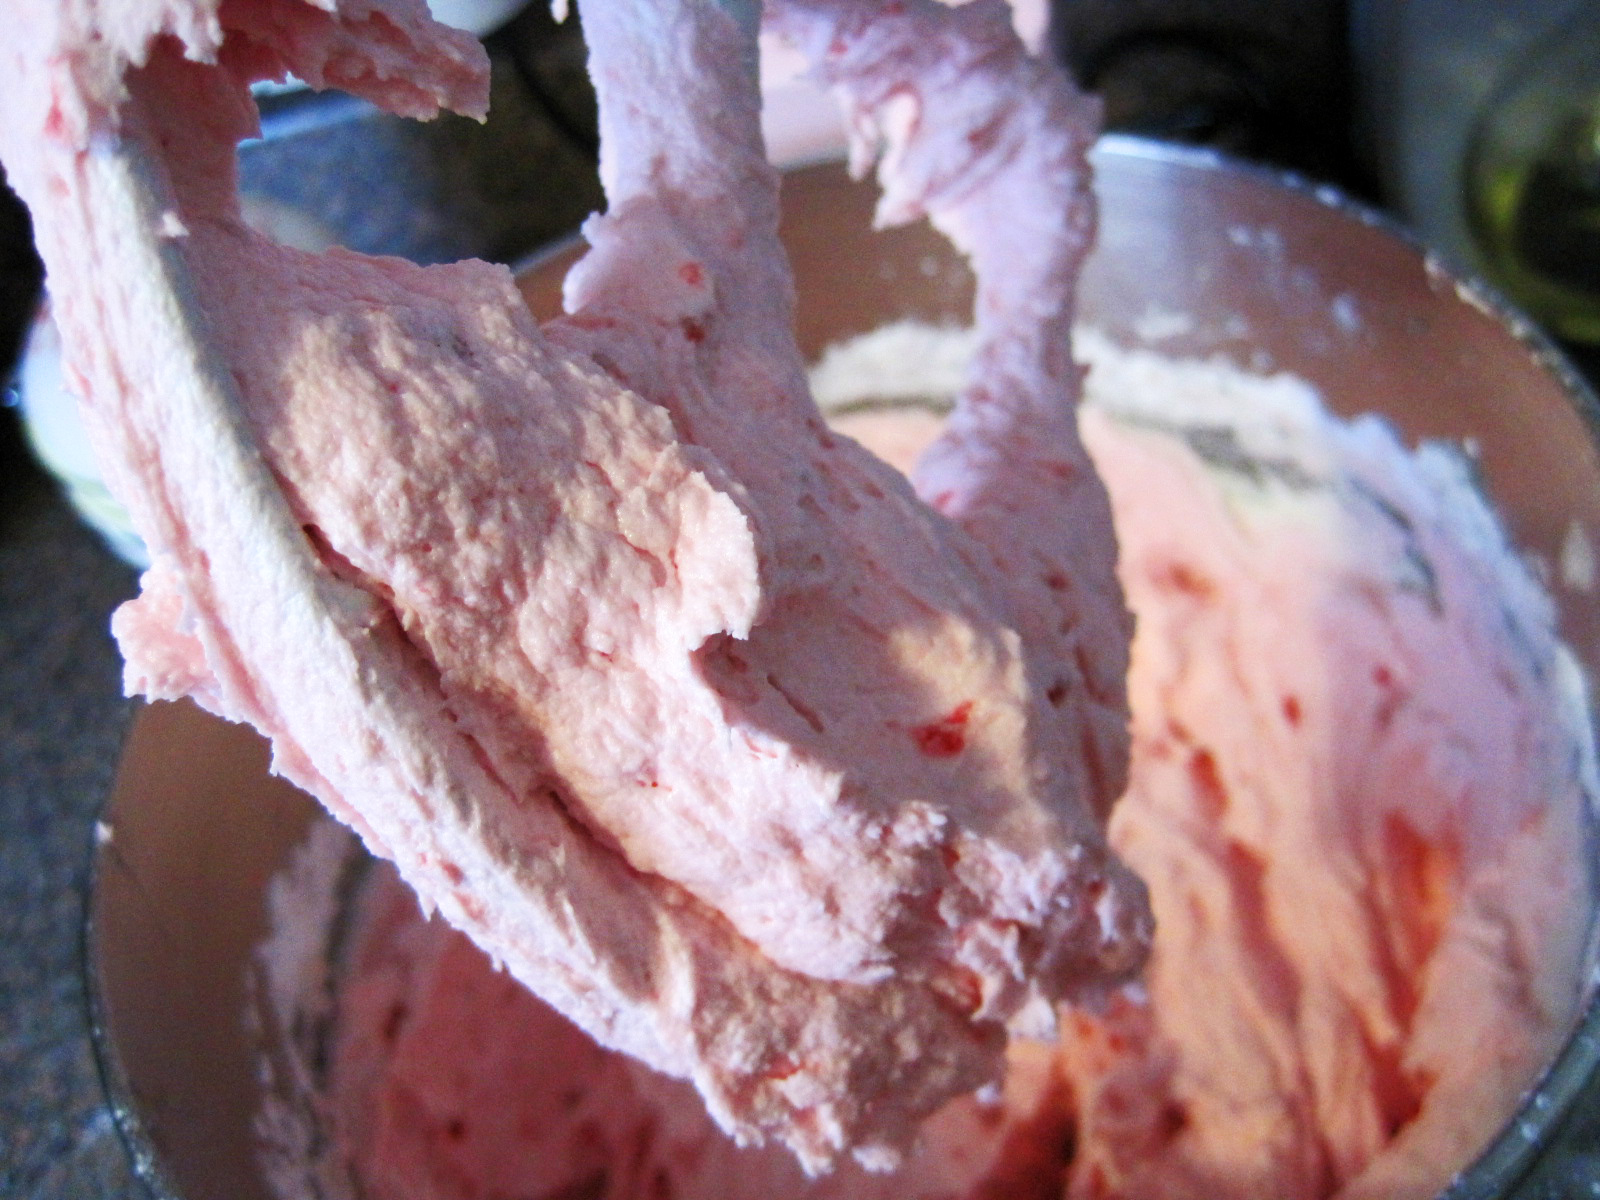
I have chosen my fondant and rolled it out. Now I put it through my snazzy KitchenAid pasta roller a few times. 


Then I roll out a few strips a half an inch wide.


Then, using a ball tool, "ruffle" one side of the strips. I need to practice this.


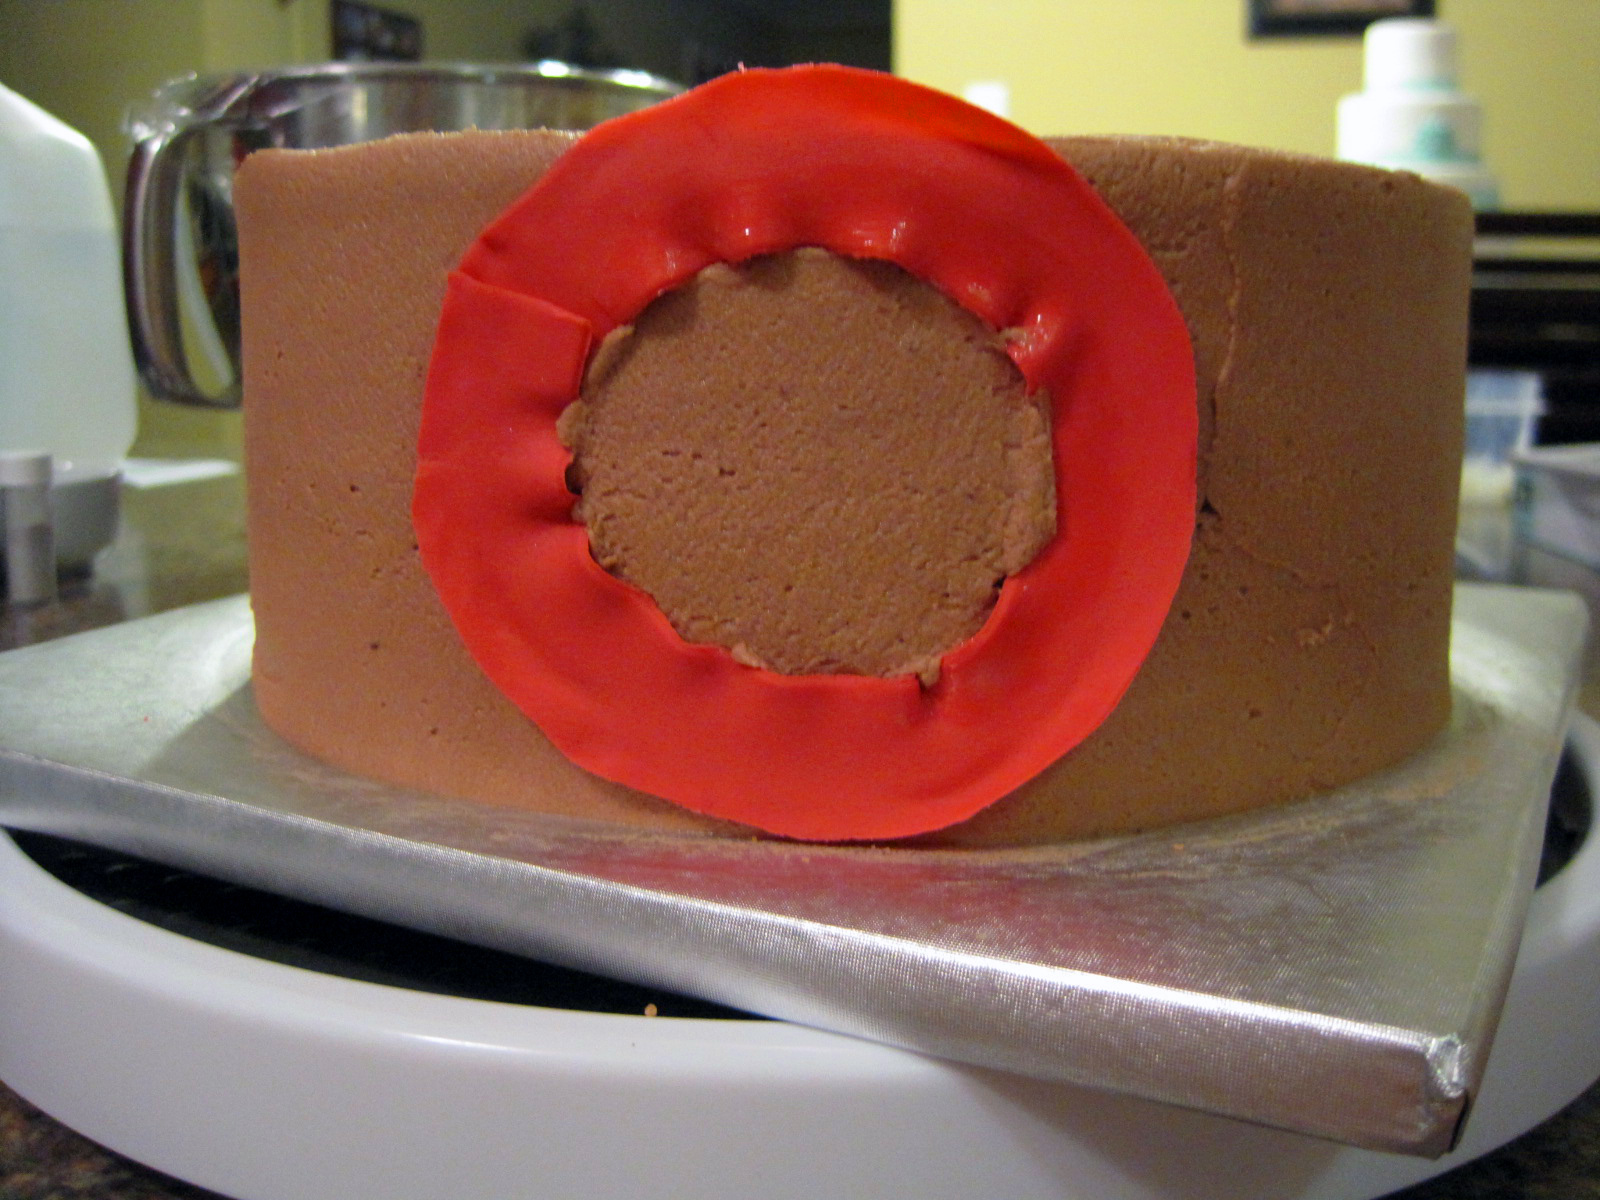
This is the point where I'm rethinking the picture by picture tutorial and thinking about just trying to accomplish this flower. I will note that I am doing this on buttercream and I'm pretty sure My Cake School did it on a fondant covered cake. I don't know how big of a difference it makes though. Do you notice how the ruffle on the outside seemed to disappear and reappear on the inside?? haha, magic. But this is the beginning of the flower. I used piping gel to attach the fondant.

Fast forward and here's my result


 Umm... I hope you can at least tell it's supposed to be a flower. I think it's... ok. But check out My Cake School. Gosh, hers is beautiful. Feel free to not compare hers and mine :)


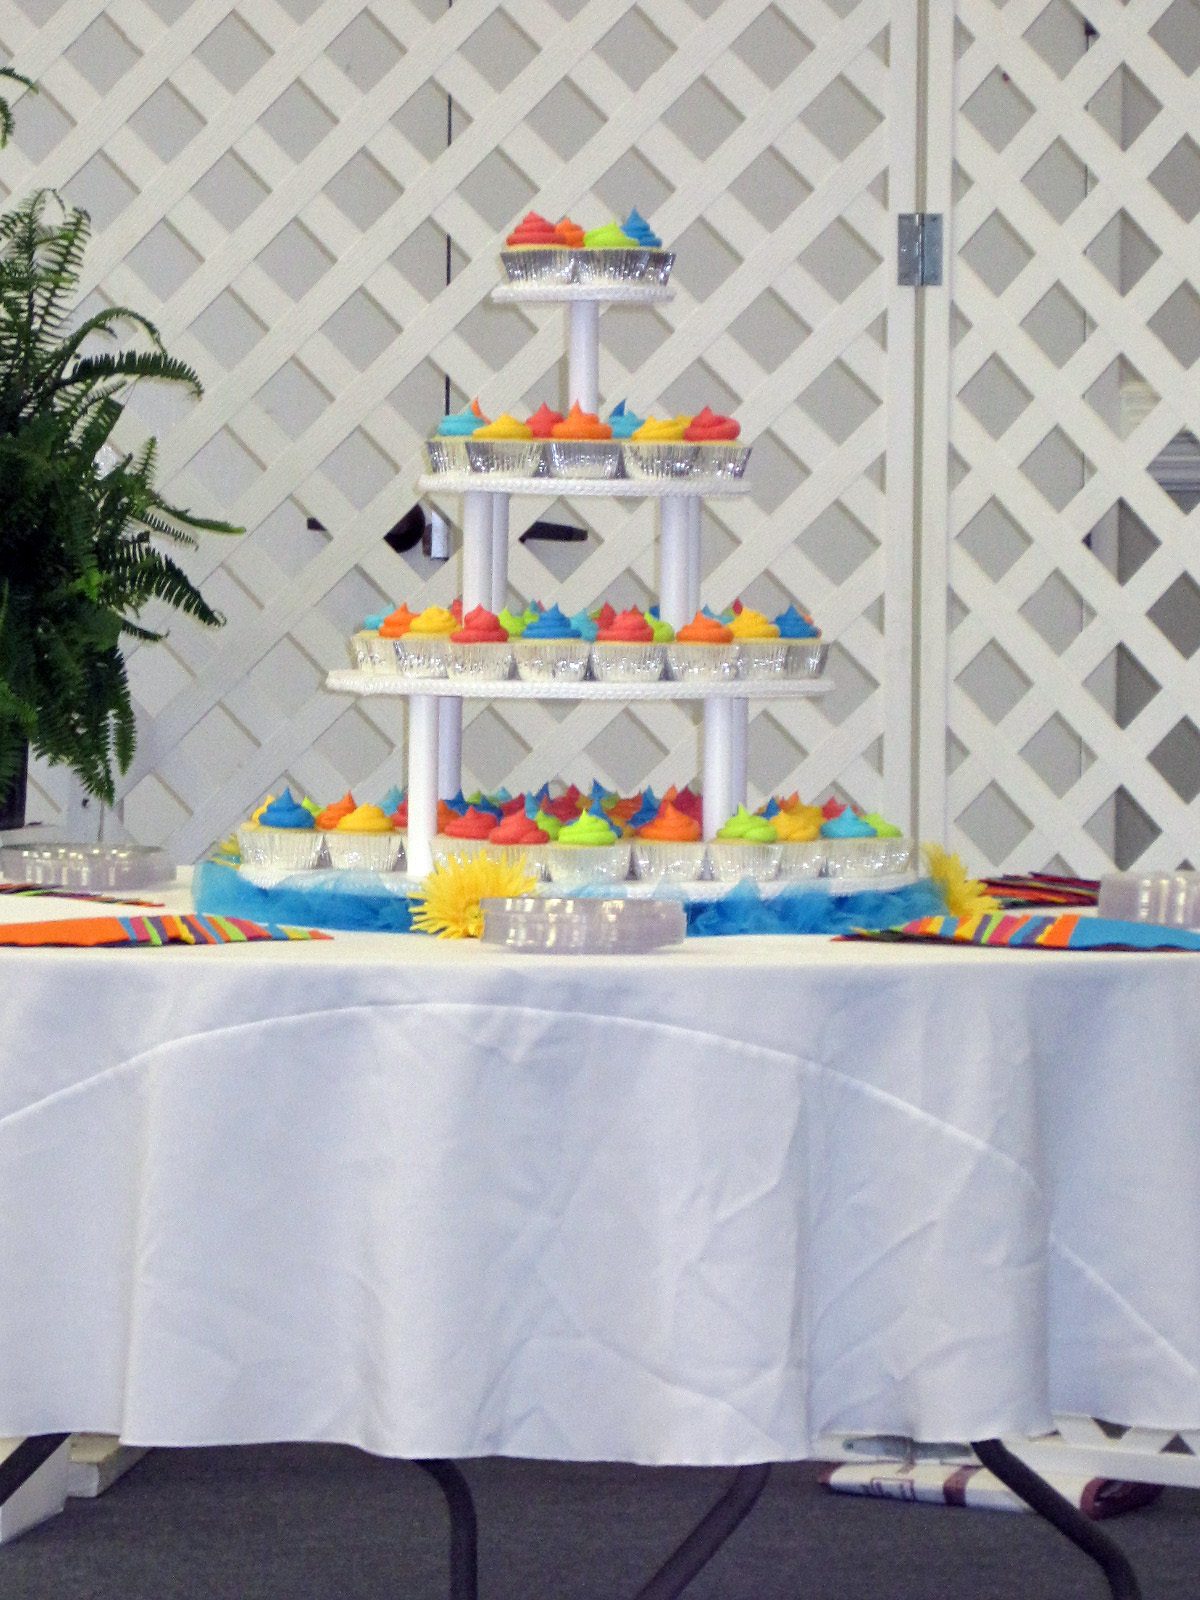
There's the final cake. Now that I've written this, I really want to re-do this whole thing. Maybe I will. Eventually. 

At least, I hope his wife liked it!! (fingers crossed)

Thursday, June 23, 2011

Tinkerbells

 I always say I'm going to try new recipes. Well it was time to actually try something new!! A few months ago I picked up a book at Target. It caught my eye because it's a "Cupcake Mystery"!! I like mysteries and, duh, I like cupcakes!! It's about two women who own a cupcake shop and find themselves in the middle of a murder. Typical, right? I don't care, I liked the book! So much, that I found the other one in the series and read it too! And I can't wait for more to be published :) Anyway, here are the books: 
 Jenn McKinlay is a big baker also. That was one of her inspirations for the books. And she included recipes in the books! If you'd like to learn more about Jenn and her books, this is her website: Jenn Mckinlay. The recipe I used today is (I'm pretty sure - it was a library book) from Sprinkle with Murder. She calls them Tinkerbells. It's a lemon cake with raspberry buttercream. Of course, she does cupcakes, but I made mine into a cake. I thought this sounded delicious!!! I tried something similar at a new cupcake boutique in town so why not try my own!! 


I love this recipe. I almost don't want to share it. But can I really hold a recipe hostage when it's not even mine to begin with. I could make you go buy the book. I could make a deal with Mrs. McKinlay! Ha, right... 
here you go:


1 cup (2 sticks) unsalted butter, softened
2 cups granulated sugar
4 extra-large eggs, at room temperature (mine were just large)
1/3 cup grated lemon zest
3 cups flour
1/2 teaspoon baking powder
1/2 teaspoon baking soda
1 teaspoon salt
1/4 cup freshly-squeezed lemon juice
3/4 cup buttermilk, at room temperature
1 teaspoon pure vanilla extract


Preheat oven to 350 degrees. Cream butter and 2 cups of sugar until fluffy (about five minutes). With the mixer on medium speed, add eggs one at a time and the lemon zest.
Sift together the flour, baking powder, baking soda, and salt. In another bowl, combine the lemon juice, buttermilk and vanilla. Add the flour and buttermilk mixtures alternately to the batter, beginning and ending with the flour.


I baked 6 inch cakes. I have two pans so with two in at a time it took 30 minutes. It made three full size 6 inch and one half size 6 inch.
Jenn McKinlay's cupcake route: bake 20 minutes. Makes 24. After iced, roll in pink sugar.


My three lemons.
Zesting! (apparently that's not a real word)
According the recipe she says it takes 6-8 large lemons. I got 1/3 cup of zest from 2. Maybe I need to do more zesting (still going to use it :) research, but what I did worked for me! Everything turned out alright and I didn't have to run back to the store. Always a plus. 

There aren't any pictures, but soon after this, I squeezed the lemons for that fresh lemon juice. That's always fun. An easy way to find any little scratch or sore spot on your hands: cover them in lemon juice!

 This is the beginning of creaming the butter and sugar.
Five minutes later!! Fluffy.
Now I followed the directions and kept it at medium speed to add the eggs. Does anyone else have this issue with the speeds on their stand mixers? Medium seemed incredibly fast to me!! I have a tendency to keep my mixer on low, like, all the time. I'm a little scaredy cat. Especially with icings. I'm scared I'm just whipping a ton of air bubbles into it if I go any faster than low. Does anyone else feel this way? Have advice? Should I buck up and pick up the speed in some cases?
Anywhoo....
Also, for the buttermilk, I just had regular milk and added some lemon juice to make it buttermilk. Which was kinda ironic because you end up mixing the buttermilk with lemon juice... But yet again, I had no issues.

Ready for the Raspberry Buttercream??

1/2 cup solid vegetable shortening
1/2 cup (1 stick) butter, softened
4 cups powdered sugar
1/2 cup fresh raspberries
**wash raspberries thoroughly beforehand

(I doubled the recipe)
I creamed the shortening and the butter, then added powdered sugar 2 cups at a time. After 6 cups of powdered sugar, I added half the raspberries since it seemed a little dry. Then I added the last two cups and the rest of the berries. 
I was surprised that it had no water or liquid to add. I was going to add some but went ahead and decorated it. Of course, nothing goes as planned. I'm not sure how I wanted to decorate the cake, but of course I want it to look pretty!! But my husband got home early from work so it threw my cake decorating time off.
Fresh raspberries 
 It looks kinda dry to me, but tastes delicious.
 My sample. I wish I could say this cupcake is all I ate of the cake...
 Stacked and ready to go.
 I did this random border. I liked it. I tried desperately to get a picture of it, but my camera didn't seem to want to focus on it. Surely you get the idea.
 Another try.
 There you go.
My mother-in-law gave me the cake stand. Can you tell I love it :)

P.S. What do you guys think of the font? It's more fun than the normal font, but is it hard to read? Btw, exclamation points look like long lower case L's. Example: Thanks for stopping by!

Saturday, June 18, 2011

Down to the Wire

Happy Saturday! I am enjoying a weekend without cakes. Don't get me wrong, I LOVE decorating, but after the craziness last weekend, I'm ok with a weekend off. Of course, I'm still thinking cake. I'm thinking of how to decorate upcoming cakes I have and I keep checking my Google Reader for new posts from the blogs I follow. But I know my husband appreciates a cake-free weekend. And my kitchen is clean!! Wonder how long that'll last...


Even though I don't have a "new" cake, I still want to share something! Since I've been doing this cake thing for over two years, I have plenty of cake stories to share (sorry if they're not exciting, but as I have said before I just can't keep myself from talking about them). 


Short background story to this cake: getting started decorating cakes, naturally, most of the people I did cakes for were friends. Since we are not from here, all the people I know are from work or church. It's kinda a bummer because I know if I were in my hometown I could get LOTS of practice from my big family and all of the friends of family and just all the people I know from growing up there. But oh well. I'll just practice so I'm really amazing by the time we move back!! ;) 


Anyway... Over a year ago, a young lady named Jennifer walked into the bakery/cafe where I work and asked if we did cakes. I told her no and didn't feel right promoting myself. Fortunately, my general manager did it for me!! He spoke up and told her I made cakes! I'm sure glad he did! I ended up doing a baby shower cake for a friend of hers. It was one of my favorite cakes I had done so far also! I suppose I can share a picture...


As you can see, the invitation was the inspiration.

 Jennifer also happens to be a fantastic photographer!! These are her pictures of the cake at the event. Lovely.

This was a big deal. The first cake I did for someone I did not know! And she was the perfect one too! I have now done cakes for her aunt, cousin, family friend, etc etc. A couple of weeks ago, her little girl was turning one! She asked me to make her cake, which of course I was honored to do so!! Jennifer came over so we could discuss the details of her little girl's first birthday cake. It was so nice to have someone come over and chat with me about what the cake would look like! Not everyone really cares so it was fun to have someone really into it. She even brought over her girl's boppy and a platter for inspiration. We talked for a good bit and had a detailed sketch. 


Before I show pictures, let me tell you the stressful events of making this cake. It was for a Sunday. I do not work weekends. Except for this weekend. We were catering the VIP area of the Hangout Music Festival in Gulf Shores (3 day long music festival). Long story short: the schedule I had discussed with my contacts with the HMF before the event were not the same once we got going with the event. I thought we would be done by 2pm everyday. Really they wanted us to work till 6 pm. So we were up at 3 am to get to the store to make the food to drive to Gulf Shores before the traffic got horrendous and now they want us to serve till 6 pm?! Side note: Gulf Shores is an hour and a half from my house. So Saturday, when I HAVE to finish the cake, we arrive in GS and they ask us to serve till 6. I kinda freak out. I just cannot stay that long. I end up leaving at 4, I think. Getting home hours later than planned. 


The cakes are baked and details are made. I can't remember if I had dirty iced them yet, but I don't think I had. Oh my goodness. I'm getting nervous. I get started as soon as I get home and am already stressed out. I usually take a while making cakes. I had to get it to her that night. So I work as hard as I can. Fortunately, Jennifer and her husband offer to come pick it up (they live about 45 min away from me) and don't mind the fact that I don't get done until after 11 pm! They were incredibly sweet and so happy with the cakes! (There was a smash cake too). I'm so glad because I really didn't get to do as many details as I planned, but she loved it. So here you go: (Sorry that my story really wasn't that short, haha! But it could've been longer!)
 Again, wonderful pictures courtesy of Jennifer :)
 Fun story about the smash cake. When I was placing it in the box for them to take (they were there witnessing this), I can't recall what happened but I "dropped" it kinda... it ended up half slid off the board. It was embarrassing and annoying but they were so easy-going and I was just incredibly happy it wasn't the tiered cake. I re-positioned it and re-piped the border and ta-da... (not as pretty as before but I think I'm the only one who could tell) but fixed!

 I can't help showing all of Jennifer's beautiful pictures!
 But here a few of my own. I usually put more effort into my pictures, but with the timing issue, pictures were the least of my concerns. But I had to get pictures with the inspirations! Above, the platter. Below, the boppy.
Everything turned out fine, but my method of getting there was not as planned!! But that's usually how it goes, right?? A wise man I know told me "don't make plans, just be prepared." That might not be verbatim, but the point is we never know what will happen! Plans never work out, but we can do our best to prepare ourselves for whatever might happen. Hmmm.... he would say it much better. I hope I got the point across though :)

Wednesday, June 15, 2011

Wedding Showers

Since my first post was all about the wedding of friends of mine I thought I'd share the shower cakes and cupcakes I made for the bride in the past few months. 

As you can see from the wedding, the bride loves colorful colors!! And she used gerebera daisies so you will see that was my inspiration.  I made these cupcakes for a shower at her work. This was the first time I've ever made gerbera daisies. I don't have a cutter so I used a regular daisy cutter. I used two and layered them to make more petals. Then I used a toothpick to make the indentions in the petals. Then set them in a few bowls covered with aluminum foil to create the shape I wanted. But for most of them I just formed the aluminum foil because I only had 4 small bowls! 

For cupcake wrappers, I made them myself! I saw a great template on one of blogs I follow: The Sweet Adventures of SugarBelle.  I followed it back to this site: Skip To My Lou. I just used regular stock paper and voila!


Can you tell I was really happy with these?! I still like them :)

Then for the church shower, I had some leftover daisies so I made a few more. I really like them :) The shower was only about a week later than the first. 
This cake looks simple enough right? Well I had planned it to be a topsy turvy cake with fondant. Oh goodness gracious.... I did it all. And it looked awful!! I was really upset. But I decided I'd rather it look nice and simple than crappy and "topsy". Then I was nervous about the flowers falling off the cake. So this simple cake took aaaallll day. People have no idea what I go through when I make a cake, haha!
I decided to add the border after I did the flowers... it would've been better to do first, but I'm glad I added it anyway.
I love these colors!


These are at the shower, with the added "A" to the top. That is the initial of the couple's last name. I loved the decor also! It made the cake look so much better than my plan white background.

Tuesday, June 14, 2011

Tiered Cake, Groom's Cake, and Cupcakes!

Hello!! I have wanted to start a blog for some time to be able to share my journey in cake decorating! The good and the bad. I shouldn't (although I might fail) share my flaws and frustration of cake decorating with everyone. I don't want them to notice. I want others to be able to see my cakes and think I did them with no problems at all. But I love cakes. And I want to talk about them all the time! Hopefully through the blog, I'll have an audience that is interested, that understands, and that could possibly help me when I encounter tough situations.


I thought this would be a good time to start my blog. I did a wedding this past weekend. Not my first, but I'm gradually moving up to bigger weddings. The first two were a challenge but simple compared to this wedding and the others I have coming up. What made this wedding such a step up was that I was to make 350 cupcakes, a small tiered cake, and the groom's cake. When it got closer to the actual wedding date, it hit me. Woah. That's a lot!! But I hate turning down cakes! I can do it :) Somehow...


So about two weeks before the wedding I start making a schedule for how I am going to accomplish all of this. I also tried to figure up how long it would take me to do roughly 30 batches of cupcakes etc. By the way, I do have a "real" job. Not to imply that this cake thing is not real work!! The point is, I did not have all day, every day to work on these cakes.  This is what I worked out:


Monday - Make fondant bows for cake, start making icing (I ended up making about 10 batches total)


Tuesday - Make more icing, pre-mix dry ingredients for cakes


Wednesday - Bake two 4", two 6", two 8", two 12"x18", two 9"x13"


Thursday - Bake 350 cupcakes, ice tiered cake
Friday - Ice all cupcakes, decorate groom's cake, work on tiered cake


Saturday - finish up any decorations for cakes


I think the schedule helped. I will say it did not all go as planned, but it all worked out. And here they are:

 Boy did this cake give me a harder time than planned! As you can see, there is cake in the icing. Incredibly frustrating! When I did my crumb coat, some that I scraped off had gotten crumbs in it and that was the icing I had to finish off with. I didn't realize it had crumbs in it until I was covering it again. And I didn't want to make more icing! But it was a gray jersey I was going from, so the speckled looked worked. That was a bummer... but then I started the red! Bluh... I hope all cake decorators don't shun me for this, but I bought red icing. I wanted it to be true red icing and not a kinda goofy-colored red, weird tasting, strange consistency icing. I just need more practice doing it on my own, which I do usually but this was a large quantity. Anyway, it all seemed fine when I dirty iced it. Then I put it in the fridge to harden... Hours later I come back to it. I don't know if it's because I did the gray first... but when I got to the red, it hadn't hardened... so when I was covering it again, all of the icing, including the first layer, was just moving around, crumb and all. And it didn't smooth out well. Oh gosh, I was so frustrated with this red icing!! I needed time away from this cake. After I had simmered down, I am pretty happy with it. Not perfect by all means, and learned the hard way on a few things, but I'm still happy with it. But did anyone notice that one sleeve is longer than the other?? See, these are things I shouldn't share, say, at the wedding with the guests... haha! (Don't worry, I didn't)
Yes, this is the inside of my fridge. It just "chilled" there right after I finished it and before we headed to the church.

One of the three cupcake stands, made by the bride's father. He did a great job!

See where I got the colors from?? Although the bride didn't give me the purple napkin so that's why there are no purple cupcakes. But six colors were enough for me anyway.

The tiered cake was tough too. Icing a cake frustrates me sometimes. Annoying because it's so basic. It all turned out though, again, with a few lessons learned the hard way again. And I did notice the tiers were not all the same height... after they were iced and ready to stack...

See, why I wanted to start the blog? For some reason, I have this tendency to want to point out all the tough parts and mistakes... I don't know why. Maybe because I put so much into it, I just want to talk about the story. I guess my stories just tend to have a lot of "oops". It's the learning process!!

Oh, and I had a cake for Sunday! I had planned to bake the cake amongst the baking for the wedding. Yeah, that didn't happen. So after the wedding (which I attended) I get to baking (around 4:30/5pm). It's a block cake. An  8x8x8 cube. I have one 8x8 square pan. I need four layers... Anyone catching on? So they're all done baking around 9. And yes, I should have done them earlier so they could've settled, but there was no time. I did experience air bubbles because of this, but I knew it was a possibility. I know better! But this is how it went this time. By 3 am, I finish! Hooray!

It was for a little boy's first birthday. That's his smash cake to the left. Yup, had to bake that too. This was my first cube/square cake. It was good practice! It's tough getting that shape. But the customer and her family liked it and that's (mostly) what matters!! I took a nice nap Sunday too. Still working on cleaning my kitchen that I had so wonderfully cleaned the weekend before...
It's looking a lot better than that! 

Well thanks for reading my blog! I know this was a loooong entry. I doubt they will all be like this. This just happened to be a eventful week full of cake! I will do my best to post whenever there's a cake, which hopefully will be often :)

Lydia